
I’ve been asked by several people to post some tips for fashion photography, so I guess this is that post. Hell, I’m nowhere near the league of SL’s finest when it comes to fashion photography. I don’t spend hours in Photoshop, painting individual hairs and all that stuff. I just do what I do, it comes out pretty well, and people seem to like it.
That said, there are some good ground rules and other tips I can pass on to anyone who might be interested in taking fashion shots (or any other kind of pic of their avatar) so read on. (And, if you’re new to my blog, be warned that I swear. A lot.)

Tip 1: Set high-resolution options for your snapshots
You’ll find this option in the Advanced menu of your viewer. You can either open that up by digging around in your preferences (depending on which viewer you use) or by toggling the CTRL+ALT+D keyboard shortcut. You want the last two checked options below: High-res Snapshot, and Quiet Snapshots. (The latter one just prevents the annoying shutter click, as well as the silly cheesy grin animation.)

When you come to taking your image, make sure you set your width in pixels to a high enough resolution, and keep ‘Constrain Proportions’ on. I usually opt for around 5000px, as below:

Set them to save as PNG. Together, these two options will remove the jagged edges around your avatar. They will also give you much more to work with if you take your images into a photo-editing program afterwards to make any adjustments.
Tip 2: Use CTRL and Zero to zoom in, not your scrollwheel
Ever wonder why you end up looking like Dory in your images?

Using the scrollwheel of your mouse to zoom in close to your avatar will result in a fish-eye lens effect. To counteract that and get a more accurate (not to mention flattering!) shot instead, get your camera reasonably close to your avatar, then use the CTRL+0 (Control and Zero) keyboard shortcut, repeatedly, until you’re as close as you need to be. (CTRL+9 will reset your camera view.)
Some examples of the difference that will make are below:


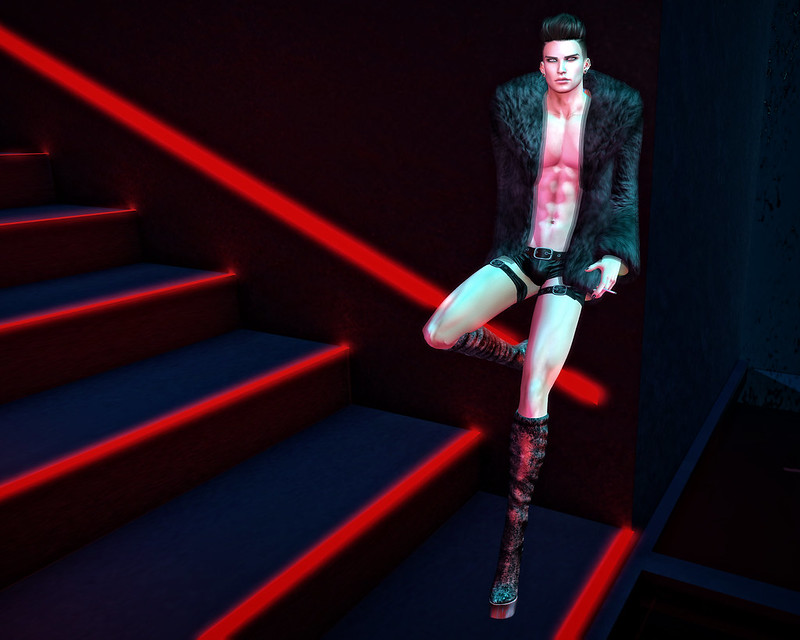
Tip 3: Get in close
You’re focusing on the fashion, so get in there and show it! If your image looks like this –

– how on earth is anyone going to see your hair or beard applier or eyes, or whatever else you’re featuring? Get up close and personal, and show off that fashion.
Secondary to that:
Tip 4: Keep the background simple
Yes, you can take gorgeous fashion shots against beautiful backgrounds, but don’t make that background too ‘busy’. Human attention spans being what they are, you don’t want anything distracting behind you. These books below? Distraction. I’m immediately trying to read the titles when I look at the pic:

I tend to favour a simple textured background. I know a lot of people love those pre-loaded photo booths that can be bought, but honestly? A basic texture or even a single-coloured wall behind you will focus the viewer’s eye on what you’re wearing. Which… is kind of the point of fashion photography.
Tip 5: Use the Rule of Thirds
Which of these looks a bit more interesting? Or even more satisfying? It’s the same pic, just cropped a bit differently.


The first is dead-centre. Yes, there’s equal space either side of the head, but that long shoulder (does it go on forever?!) on the left versus short shoulder and gap on the other side just doesn’t… feel right. However, in the second shot the Rule of Thirds is in play. The focal point—the head and its accessory—is off-centre and over on the right-hand third of the shot. The long shoulder draws the eye in a pleasing way, and there’s space to offer some text if needed. (If not, the ‘dead space’ still feels right.)
A couple more examples of the Rule of Thirds, from my Flickr:
Sometimes the Rule of Thirds can be ignored and will even work against an image. An example would be the pic below:
That shot gains more gravitas and focus by being central. The pose is calm and centred and in control, thus the image positioning reflects that.
Tip 6: Play with Windlight
If you have the Firestorm viewer then you already have a plethora of Windlight settings at your fingertips. Play around with them! Try editing them, just moving the sun slider to see what effects you can get on your avatar’s face. Here are four examples of the exact same pose changing drastically because of the Windlight settings used:

For darker Windlights, try using a very soft (and I mean SOFT!) facelight, or some projected lighting on your avatar. You’ll get the moodiness of the Windlight, but your avatar won’t be completely obscured by it.
Tip 7: Take a LOT of images, then whittle them down
I usually take tens of images from all kinds of angles (and in multiple Windlights), then whittle them down to one or two (or, at best, half a dozen). This little lot here –

– ended up as this:
Tip 8: Try slow-motion animations
Got a Bento mesh head? Try this little trick:

(Click the set of double lines at the top of that small menu popout, and that will ‘snap it off’ so you can keep it on your screen [until you relog or close it] and not have to go hunting for it each time.)
That setting will slow down your animations (on your viewer only). It’s perfect for capturing that hint of a smile right before you break into an ear-splitting grin, or the moment when your eyelids flutter perfectly shut just before you pull a silly face. By watching each of your Bento mesh head’s animations at normal speed you can identify the moments you want to capture, then run them again in slow-motion, with your cursor poised over the ‘refresh’ button of your screenshot window. This vastly increases the number of possible face animations (in the form of those individual little moments) that you can make use of for your images.
(The Developer menu is enabled via the Advanced menu, and—if using Firestorm—via the Advanced tab of your preferences.)
It’s also great for slowing down dances to catch some interesting moments. I did that with a set of Lady Gaga ‘Bad Romance’ dances for these images:

See this little smirk and eyebrow-raise? It’s subtle, but it’s the very start of a ‘flirt’ animation:

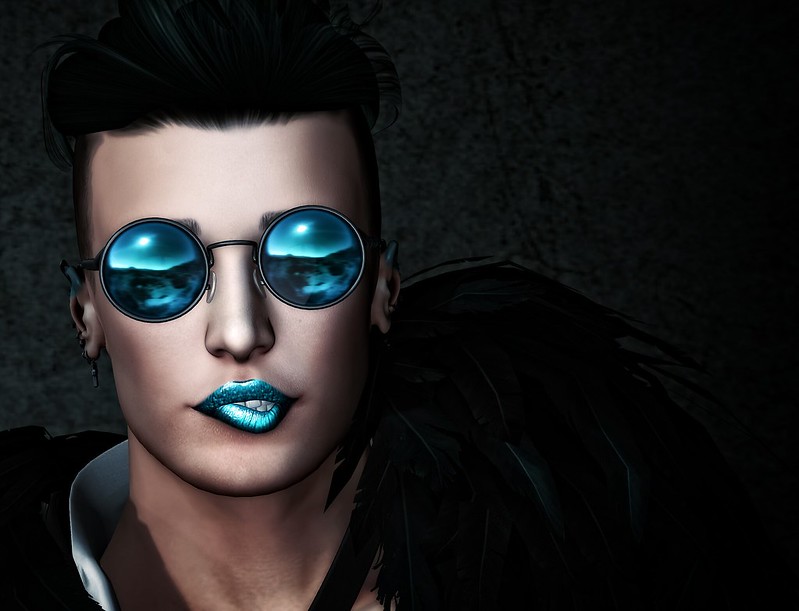
Tip 9: Take advantage of eye direction
Whether you use the eye-poser on your mesh head or a freebie eye-direction HUD like this one, play around with moving your eyes. You can look directly into camera, look down wistfully, gaze up into the distance. Eye direction can add a lot of character to an image. Just a couple of examples below:

Tip 10: Don’t foreshorten yourself!
Okay, so Skell has giraffe legs, so the ‘before’ image below doesn’t really work too well. But taking an image from above will foreshorten your legs to such an extent that you’re at risk of singing Oompa-Loompa-doompety-do. Angle your camera at your midriff, or—if you want to lengthen your legs a bit or give your avatar’s pose a slight air of authority—then angle it at the knees and look slightly up.
However, if you like the look of your avatar’s head or face from that higher angle, get in close (CTRL+0 again) and leave your legs out of the shot.

I’ve seen people taking photos from above that make their legs look much shorter than their torsos. That’s not a good look!
Tip 11: Ladies? Be careful where the ‘boob cut-off’ goes!
No screenshot for this one, because… well, Skell doesn’t have boobs. But a bit of advice for the ladies here, because this is something that really stands out and isn’t very flattering. When taking a head-on image of your avatar, keep an eye on where the lower edge of the image is in relation to your breasts. Either include them fully, or cut the image off just below the collar bone. If the bottom of the image is too low—well into the fullness of your breasts—it can make them look disproportionately big, because like the “does that shoulder go on forever?” thing mentioned in point 5, the brain expects the outline to continue in the same direction as the point of cut-off (if that makes sense).
Tip 12: Fuck around with your images
Aaand there’s your one swear for this post XD
Whether you just crop them using Paint or you take them into Gimp or Photoshop, whether you find Insta-worthy filters or use Pixlr (which is a free online app) play around with your images and see what else you can do with them. BUT! Don’t go too far. If you obscure your image too much, you’re back to that “how the hell can people see what you’re wearing?” thing.
Tip 13: Want to show more than one part of the look? Composite!
Photoscape is a free photo-editing program that also contains a ‘page’ function with tens of preset image-holding layouts. Choose your image dimensions, pick a layout, then drag your images across and they’ll automatically be fitted into the sections of the layout. I use this a lot when I want to show multiple shots in a single image. (I’ve been using it throughout this post, too.)
And that’s your lot. Hopefully these tips will be useful to you.
Really insanely helpful! Thanks so much. I had no clue about the slow motion for the animations. Can’t wait to try it out!
Thank you! I’m glad you found it useful.